Do these 3 things before closing this tab:
1Scan for outdated or missing drivers - takes under a minute2Clear out junk files and repair common Windows errors3Fix the driver behind crashes, sound loss and screen glitchesInferse is reader-supported. When you buy through links on our site, we may earn an affiliate commission. As an Amazon Associate I earn from qualifying purchases. Learn more
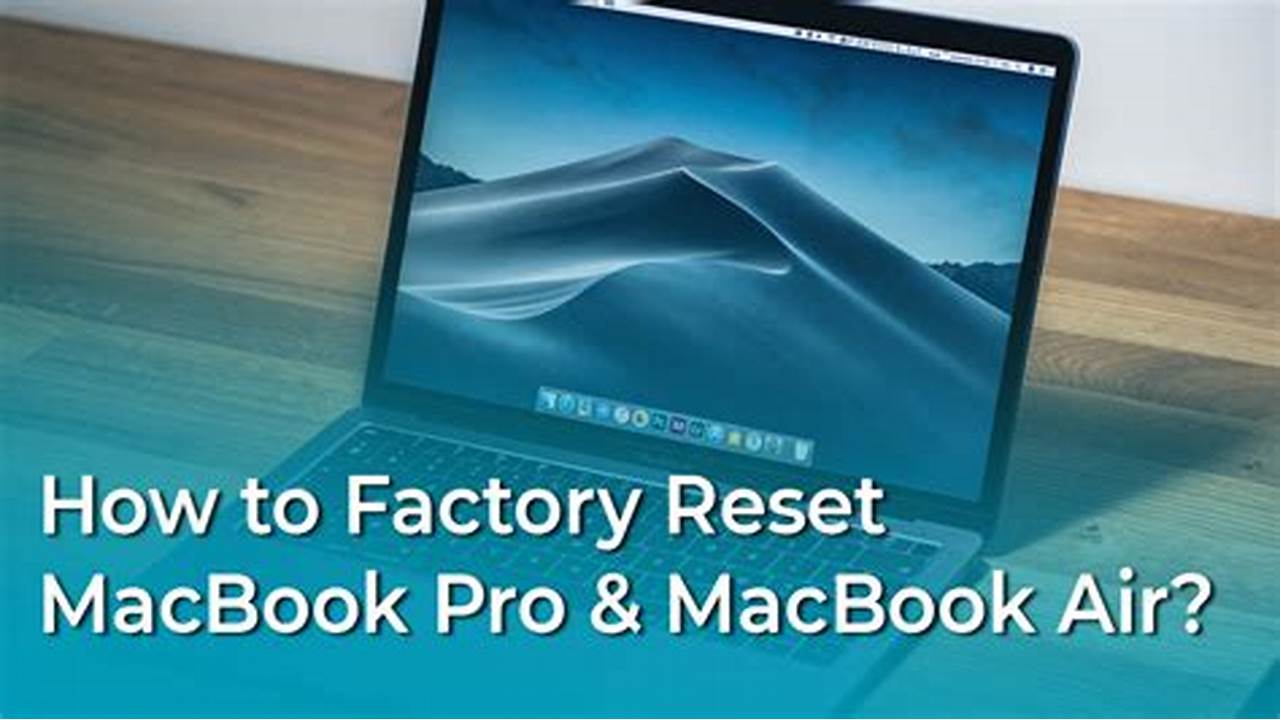
Performing a factory reset on a MacBook without a password is a common need, whether you’ve forgotten your login credentials, are selling the device, or troubleshooting a major system issue. While you can’t simply bypass the password to access the desktop and then reset from there, macOS offers robust Recovery Mode options that allow you to erase the disk and reinstall the operating system, effectively returning the MacBook to its factory settings without requiring the user password.
This how-to guide will provide a step-by-step process for performing a factory reset on your MacBook without the password, primarily utilizing macOS Recovery Mode and Disk Utility.
General shopping ads
How to Reset MacBook to Factory Settings Without Password
PC Slower Than It Used to Be?
A free scan shows the junk files, broken settings and background clutter dragging Windows down - then fixes them in one click.Free scan · Windows 10 & 11Outdated Drivers Are Slowing You Down
One free scan finds every outdated or missing driver and matches the right update for your exact hardware.Free scan · exact hardware matchThe key to resetting your MacBook to factory settings when you don’t know the password lies in booting into macOS Recovery Mode. From there, you can access tools to erase the hard drive and then reinstall a fresh copy of macOS. The exact steps to enter Recovery Mode differ slightly depending on whether your MacBook has an Intel processor or Apple Silicon (M1/M2/M3 chips).
Shopping ad

- Dimensions: 7.5" x 4.3" x 2.2". Compact size and lightweight make it easy to carry and put into your backpack, handbags or laptop bag without taking much space. Suitable for family use and daily organization. Note: Small mesh pockets are ideal for charging cords no longer than 3ft; longer cables (over 3ft) fit better in the larger compartments
- Quality Material: This electronic organizer travel case made of high quality durable waterproof oxford and soft sponge inside to secure your gadgets in place and deliver a quick access whenever you want. Water-resistant fabric protects your gear from unexpected splashes, keeping all your electronic essentials safe and secure
- Double Layers Design: This tech pouch features a double-layer interior design with 8 compartments, including multiple see-through mesh pockets and ample space to store your cords, cables, USB drives, cellphone, charger, mouse, flash drive and more, keeping all accessories neatly organized and tangle-free
- Practical and Convenient: Comes with a comfortable hand strap for easy carrying; You may carry it in your hand when heading out. Durable and smooth zipper closure keeps your favorite device securely, convenient for you to have quick access to the items inside the case
- Portable and Lightweight: The small size and lightweight design durable cable organizer pouch is a perfect choice when going on holiday, business trip, travel, office. Enjoy hassle-free travel without wasting time on tangled accessories. Great gift for yourself also a nice share with families and friends. (No include cords, electronic accessories)
Important Considerations Before You Begin:
- Data Loss: This process will erase all data on your MacBook’s internal drive. If you have any important files, photos, or documents, and you don’t have a backup, they will be permanently lost. There’s no way to back up data if you cannot log in.
- Internet Connection: You will need a stable internet connection for the process, as macOS will need to download the operating system installer.
- Power Source: Ensure your MacBook is connected to its power adapter throughout the entire process to prevent unexpected shutdowns.
- Apple ID/Activation Lock: If “Find My” was enabled on the MacBook and it’s linked to an Apple ID, you might encounter an Activation Lock after the reset. You will need the associated Apple ID and password to proceed. If you don’t have this, contact the original owner or Apple Support with proof of purchase.
Step 1: Identify Your MacBook’s Processor Type
The method to enter macOS Recovery Mode varies based on your MacBook’s processor.
- Apple Silicon (M1, M2, M3, etc.): These Macs feature Apple’s own ARM-based processors. Check by going to Apple menu (\u2318) > About This Mac. If you see “Chip” followed by “Apple M1,” “Apple M2,” etc., you have an Apple Silicon Mac.
- Intel-based Mac: If “About This Mac” shows “Processor” followed by an Intel chip name, you have an Intel-based Mac.
Step 2: Boot into macOS Recovery Mode
Follow the instructions specific to your MacBook’s processor.
Shopping ad

- 【UPGRADED LAPTOP CLEANING KIT 】 The macbook cleaning kit computer screen cleaner comes with a number of accessories including a retractable large brush, polishing cleaning cloth X 2, keycap puller, metal pen tip, flocking sponge, thin soft brush, soft plastic lens cleaning pen, 5 replacing cloth, large cleaning microfiber cloth. You deserve the comprehensive computer cleaning kit keyboard vacuum at a low cost
- 【PROFESSIONAL KEYBOARD CLEANING KIT】 The laptop screen cleaner keyboard cleaner can pull out the keycaps of gaming keyboards and mechanical keyboards. A retractable keyboard brush works on laptops and keyboards, while the mini high-density brush is great for deep cleaning between keys for cleaning between flatter keys on a laptop, the metal pin tip gently removes any stains. This electronic cleaning kit macbook cleaner totally meets professional cleaning needs
- 【OFFICE DESK ACCESSORIES】This keyboard cleaner kit is easy to use and can clean your keyboard and electronic screen with just one swipe. Wiping with the 2mm thicken widen polishing cleaning cloth designed at a right angle for better fitting screen corners of computers with our recyclable cleaning spray, The laptop cleaner kit for macbook effectively absorbs stubborn stains, leaves no discoloration, no streaks, and no fiber shedding on the screens
- 【MULTIFUNCTIONAL TOOLS 】Mini soft brush and soft plastic lens cleaning pen are specially designed for DSLR camera screen, lens, and other delicate surfaces. 5 more cleaning cloths of it supplied for replacement. The flocking sponge is an excellent tool for cleaning earbuds charging cases, And the earbud cleaning kit is ideal. This electronics for college students is equivalent to 10 other electronic cleaning kit
- 【PORTABLE DESIGN & CLEANER TOOL】 The office supplies is compact in design, easy to carry, and you can easily take it anywhere. It's convenient to keep one in a drawer, one in your car, or in your bag and dorm. It is easy to use and can clean your keyboard and electronic screen with just one swipe. Is the college essentials cleaning tool for your friends, family, colleagues and students
For Apple Silicon Macs:
- Shut down your MacBook completely.
- Press and hold the Power button (Touch ID button) until you see “Loading startup options.” This usually takes about 10-15 seconds.
- Click “Options”, then click “Continue.”
- Your Mac will now boot into macOS Recovery.
For Intel-based Macs:
- Shut down your MacBook completely.
- Press the Power button to turn on your Mac.
- Immediately press and hold Command (\u2318) + R.
- Keep holding until you see the Apple logo or a spinning globe.
Step 3: Erase Your MacBook’s Hard Drive Using Disk Utility
Recommended Free Tools
- From the macOS Utilities window, select “Disk Utility” and click “Continue.”
- Click “View” in the menu bar and choose “Show All Devices.”
- Select the top-level drive (e.g., “Apple SSD”).
- Click “Erase.”
- Set Name: Macintosh HD (or your preference).
- Format: APFS (for newer Macs) or Mac OS Extended (Journaled).
- Scheme: GUID Partition Map.
- Click “Erase Volume Group” (or just “Erase”).
- Click “Done” once the process completes.
Step 4: Reinstall macOS
- From macOS Utilities, select “Reinstall macOS [Version]” and click “Continue.”
- Follow prompts, select the newly erased drive.
- Allow time for download and installation. Do not interrupt.
Step 5: Complete Setup (or Prepare for New Owner)
- If keeping: Follow the setup prompts.
- If selling: Shut down at the “Hello” screen to leave in out-of-box state.
Troubleshooting and Advanced Scenarios
- Apple ID Lock: If prompted for an Apple ID, you must enter the original account credentials.
- Internet Recovery: Try Shift-Option-Command-R or Option-Command-R if Recovery Mode fails.
- Date Error: If you see an error preparing installation, open Terminal and reset the date.
- Bootable Installer: Use another Mac to create a USB installer if needed.
By diligently following these steps, you can successfully perform a factory reset on your MacBook without knowing the current user password, preparing it for a fresh start or a new owner.
More shopping ads
Shopping ad

- Award-Winning Compact Design & EDC-Ready Gift Choice: Weighing only 0.09 lb and sized like a credit card, this compact laser measure is designed for everyday carry. It slips easily into a pocket, tool pouch, or bag, and can attach to a keychain for quick access wherever you go. Its minimalist design, premium tactile finish, and practical one-button measuring make it a useful EDC gadget for DIYers, real estate agents, homeowners, and tech enthusiasts. A thoughtful gift for men on any occasion
- One-Button Easy Measuring, Simple to Use: Designed with simple one-button operation, this compact laser tape measure makes quick measuring easy without complicated controls. Just press to measure room dimensions, furniture spacing, window height, wall décor placement, and everyday distances around the home. Ideal for users who want a smart, pocket-size measuring tool that fits naturally into an everyday carry (EDC) setup and feels intuitive, modern, and easy to use
- Fast & Accurate Indoor Measurements with Class 2 Laser: Measure distances from 0.16 ft to 98 ft with up to ±1/16 in / ±2 mm accuracy. With quick measurement response in about 0.2 seconds, HOTO helps you check spaces efficiently for home renovation, furniture layout, moving, decorating, craft projects, and DIY planning. Built with a Class 2 laser for everyday indoor measuring; use as directed and avoid direct eye exposure
- Low-Power OLED Display & USB-C Rechargeable Convenience: The low-power OLED display provides clear indoor readings while helping reduce battery drain. With USB-C rechargeable design, auto shut-off, and up to 1000 measurements per charge, this digital laser measure is built for repeated daily use without frequent battery replacement. Compact enough to keep in a drawer, toolbox, bag, or pocket
- Useful for Home, Work & Everyday Projects: From home renovation and furniture measuring to room planning, real estate checks, interior design, and light construction projects, this pocket-size laser distance measure is made for practical everyday use. Compact enough to keep in a drawer, toolbox, bag, or pocket, it is a stylish measuring tool that feels just as giftable as it is useful
Shopping ad
- Universal fit: ColorCoral cleaning gel, simple and convenient cleaning kits for PC/laptop keyboard and other rugged surface, such as the car vent, camera, printer, telephone, calculator, Instrument, speaker, air conditioner, TV and other appliances
- Safe cleaning gel: The keyboard cleaner gel is made from natural gel, no sticky to hands, smells sweet with lemon fragrance, no stimulation to skin
- Easy dust cleaning: Make sure your hands are dry and clean, knead the cleaning gel into a ball, press the cleaning gel slowly into the keyboard, car vent and rugged surface till the cleaning gel could touch the bottom and then pull out, the dust would be carried away with the cleaning gel
- Reusable: The keyboard cleaning gel could be used repeatedly till the color turn to dark or it become sticky, then you have to replace the cleaning gel with a new one. After cleaning, please stock the cleaning gel in cool place. (Note: Don’t wash the gel in water.)
- In the package: 1 can of universal cleaning gel, we provide the cleaning gel with brand new, if you find the package broken, the cleaning gel dirty, or any other quality issues, please email us through message, we provide you new one soon
Shopping ad

- Compatible Space: This electronics organizer bag features 2 zippered mesh pockets fits phones, standard power banks, 4 elastic loop pouches for small items, 2 elastic loop pouches for wireless headphones and small chargers. Elastic loops for phone charging cable. And specific slots for SD cards. Please check the size to ensure it meets your needs
- Lightweight Travel Accessories: The size of the electronic organizer travel case is 10.6" L x 7.5" W x 1.2" H, Compact but substantial size fits your intended bag or space. Suitable for traveling use and daily organization
- Keep Everything Organized: This compact travel organizer features dedicated compartments for your phone charger, cables, and tech accessories, keeping them tangle-free and ready to go. You can find travel accessories quickly, no chasing cords in your pack anymore
- Durable Travel Essentials: Features double zippers for easy access, elastic loops with non-slip grips for daily protection. Organizer for office use and traveling, (Not including cords, electronic accessories). It can serve as a travel checklist. Before you leave a place, just open the case and check if everything is there, preventing you from leaving things behind
- Versatile Use: Its practicality and convenience make it a travel essential bag. It is suitable for a weekend trip, business trip, and travel. This organizer pouch is suitable for office, business, daily use and can be given as a gift for friends, family, or men, for birthdays, Valentine's Day, Christmas Day, Father's Day
Product prices and availability are accurate as of the date/time indicated and are subject to change. Any price and availability information displayed on Amazon at the time of purchase will apply.
Independent reader supportYour contribution helps us test, update, and keep practical guides available for everyone.