

What’s actually slowing this PC down?
Pick the symptom - the matching free tool is one click away.
Inferse is reader-supported. When you buy through links on our site, we may earn an affiliate commission. As an Amazon Associate I earn from qualifying purchases. Learn more
Network connectivity issues on your Windows laptop can be incredibly frustrating. From Wi-Fi not connecting to intermittent internet access or slow speeds, a myriad of problems can arise from corrupted network configurations or outdated settings. When basic troubleshooting steps fail, learning how to reset network settings in Windows can often be the most effective solution. This process essentially reinstalls your network adapters and restores networking components to their default state, resolving many underlying issues.
Understanding What a Network Reset Does
A network reset in Windows performs several key actions:
- Reinstalls Network Adapters: All network adapters (Wi-Fi, Ethernet, Bluetooth network adapters, VPN clients) are uninstalled and then reinstalled. This effectively gives them a fresh start.
- Resets Networking Components: Key networking components and protocols (like Winsock and TCP/IP) are reset to their default settings.
- Removes Saved Network Information: All saved Wi-Fi networks and their passwords, Ethernet configurations, and VPN connections will be removed. You will need to re-enter Wi-Fi passwords and re-establish other connections.
- Clears DNS Cache: The DNS resolver cache is flushed.
This reset essentially provides a “clean slate” for your network configuration, eliminating conflicts or corruptions that might be causing problems.
Crashes, No Sound, or Screen Glitches?
Random freezes, missing sound and display glitches usually trace back to one bad driver. Find and replace yours safely.Free scan · under a minuteWindows Errors? Fix Them Before They Spread
Repair common Windows errors and clear accumulated junk for a smoother, more stable PC - no reinstall needed.Free scan · no reinstallWhen to Perform a Network Reset:
Consider a network reset if you experience:
- Persistent Wi-Fi connection issues (cannot connect, intermittent drops).
- “No Internet access” even when connected to Wi-Fi/Ethernet.
- Slow internet speeds not related to your ISP.
- Problems after a Windows update or new software installation.
- VPN or firewall issues affecting network access.
- Troubleshooting steps like driver updates and router restarts have failed.
Let’s walk through the steps to reset your network settings.
Shopping ad

- UBIQUITI ACCESS POINTS: Quickly releases the locking tab on Ubiquiti Wifi Access Points to unlock the base in seconds
- RESET BUTTON PIN: Easily presses and holds down hard-to-reach reset buttons with ease
- STEEL BRAID RING: Made from a durable stainless steel for easy tethering
- STAINLESS STEEL COMPONENTS: Provide durability and rigidity to last a lifetime
- Using the Windows Settings App (Recommended Method)
This is the most straightforward and user-friendly way to perform a network reset in both Windows 10 and Windows 11.
- Step 1: Open Windows Settings.
- Click the Start button (Windows logo) in the bottom-left corner of your screen.
- Click the Settings icon (gear symbol).
- Step 2: Navigate to Network & Internet Settings.
- In the Settings window, click on “Network & internet.”
- Step 3: Access Advanced Network Settings.
- Scroll down and click on “Advanced network settings.” (On some older Windows 10 versions, this might be directly under “Network status” or “Change your network settings”).
- Step 4: Initiate Network Reset.
- Scroll down further in the “Advanced network settings” page.
- Click on “Network reset.”
- Step 5: Confirm the Reset.
- You will see a summary explaining what the network reset will do. Read it carefully.
- Click the “Reset now” button.
- Windows will prompt you to confirm. Click “Yes.”
- Your computer will then warn you that it will restart in 5 minutes.
- Step 6: Restart Your Computer.
- It’s best to save any open work immediately. Windows will automatically restart after the countdown, or you can manually restart it sooner.
- Resetting IP/DNS Configuration via Command Prompt (Complementary Method)
While the full network reset is comprehensive, sometimes just flushing the DNS cache and resetting IP configuration can resolve minor connectivity hiccups. This method is often used before resorting to a full network reset, or as a complementary step if issues persist.
Shopping ad

- Fast & Hassle-Free Removal – No more struggling with hard-to-release Ubiquiti access points.
- Built-in Reset Tool – The precision stainless steel reset pin makes pressing and holding reset buttons easy—even in tight spaces!
- Durable & Professional-Grade – Made in the USA with high-impact PETG and stainless steel for long-lasting reliability.
- Compact & Convenient – Includes a braided steel keyring so you can keep it handy at all times.
- Material: 3D Printed High-Impact PETG (Handle), Stainless Steel (Blade & Reset Pin)
- Step 1: Open Command Prompt as Administrator.
- Search for “cmd” in the Windows search bar (or Start menu).
- Right-click on “Command Prompt” in the search results.
- Select “Run as administrator.” Click “Yes” if prompted by User Account Control.
- Step 2: Execute Network Reset Commands.
- Type the following commands, pressing Enter after each one:
- netsh winsock reset (Resets the Winsock Catalog, which helps Windows communicate with network services.)
- netsh int ip reset (Resets the TCP/IP stack, which manages network communication.)
- ipconfig /release (Releases your current IP address.)
- ipconfig /renew (Requests a new IP address from your router/DHCP server.)
- ipconfig /flushdns (Clears the DNS resolver cache.)
- Type the following commands, pressing Enter after each one:
- Step 3: Restart Your Computer.
- Close the Command Prompt window.
- Restart your computer for the changes to take full effect.
- Resetting a Specific Wi-Fi Network Profile (If Only One Network is Problematic)
If you only have trouble connecting to a specific Wi-Fi network, forgetting that network’s profile can often resolve the issue without a full network reset.
- Step 1: Open Wi-Fi Settings.
- Go to Settings > Network & internet > Wi-Fi.
- Step 2: Manage Known Networks.
- Click on “Manage known networks.”
- Step 3: Forget the Network.
- Find the problematic Wi-Fi network in the list.
- Click on it, then click “Forget.”
- Step 4: Reconnect.
- Go back to the Wi-Fi quick settings (taskbar icon) or Wi-Fi settings.
- Select the network from the available list, click “Connect,” and enter the password again.
After the Network Reset: What to Expect
- Restart Required: Your computer will restart to complete the process.
- Re-connect to Wi-Fi: You will need to manually reconnect to your Wi-Fi network and enter its password. Have it ready!
- Reconfigure VPNs/Ethernet: If you use a VPN client, you may need to reconfigure it or log in again. If you have static IP addresses configured for Ethernet, you’ll need to re-enter those.
- Test Your Connection: After restarting and reconnecting, open a web browser to confirm that your internet connection is working correctly.
By understanding the benefits and steps involved, you can confidently reset network settings in Windows to resolve a wide range of connectivity issues and restore your internet access.
Quick Recap
Shopping ad
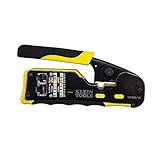
- EFFICIENT INSTALLATION: Modular crimp-connector tool with Pass-Thru RJ45 plugs for voice and data applications, streamlining installation process
- VERSATILE FUNCTIONALITY: Wire stripper, crimper, and cutter in one tool, designed for STP/UTP paired-conductor data cables
- PRECISE TRIMMING: Flush trimming to connector end face to prevent unintended contact between conductors, ensuring optimal performance
- COMPATIBLE CONNECTORS: Crimps and trims Klein Tools RJ45 Pass-Thru Connectors, providing reliable and secure connections
- WIDE COMPATIBILITY: Supports crimping of 4, 6, and 8 position modular connectors, including RJ11/RJ12 standard and RJ45 Klein Tools Pass-Thru
Shopping ad
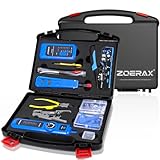
- ✅【All-in-One Professional Kit with Sturdy Case】This premium network tool kit comes in a lightweight yet heavy-duty case that keeps all tools securely organized. Perfect for easy transport and storage, it’s your go-anywhere solution for home, office, server rooms, engineering projects, and network installations.
- ✅【Complete Tool Set for Pros & DIYers】Equipped with a high-performance Cat6A/Cat6/Cat5e/Cat5 pass-through crimper, wire tracker, 110/88 punch down tool, network stripper, wire cutter, 10 Cat6 pass-through connectors, and RJ45 boots. Everything you need for reliable and lasting connections.
- ✅【Versatile Ethernet Crimper with Tool-Free Adjustment】Master cable making with this multi-function crimping tool. Works with both pass-through and non-pass-through RJ45/RJ11/RJ12 connectors. Also strips, cuts, and crimps metal dovetail clips & terminals. The unique rotating knob allows quick adjustments—no screwdriver needed!
- ✅【Ergonomic 110/88 Punch Down Tool】Features a comfortable grip and interchangeable, reversible blades for 110 and 110/88 standards. Makes clean terminations in one smooth action—ideal for Cat6a, Cat6, Cat5e, and Cat5 cables.
- ✅【Smart Wire Tracker & Cable Tester】Quickly locate breaks and identify wires across connected devices like routers, switches, and PCs. Supports tracking of RJ11, RJ45, and other metal cables (with adapter). Tests network and telephone lines for opens, shorts, miswires, and reversed connections.
Shopping ad
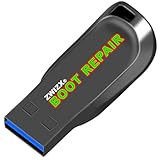
- Diagnose and Repair Windows 10&11 64-bit directly from the USB drive. No usage limits. Comes in very handy.
- BOOT REPAIR by ZWIZX: Get back into Windows if you encounter common boot errors. Fix the notorious “Blue Screen” error. This utility gives you a chance to get back into Windows, backup your files and troubleshoot the issue further if necessary.
- OTHER TOOLS: Password reset, connect to your LAN or wireless network, browse the internet, scan and remove viruses, file copy utility, scan and repair filesystem errors, hard drive health check and more.
- DURABLE: Rugged 32GB USB 3.0 flash drive is housed in a solid metal enclosure.
- INSTRUCTIONS: Complete video and written instructions on how to fix your boot issues and how to install Windows.
Product prices and availability are accurate as of the date/time indicated and are subject to change. Any price and availability information displayed on Amazon at the time of purchase will apply.
Independent reader supportYour contribution helps us test, update, and keep practical guides available for everyone.