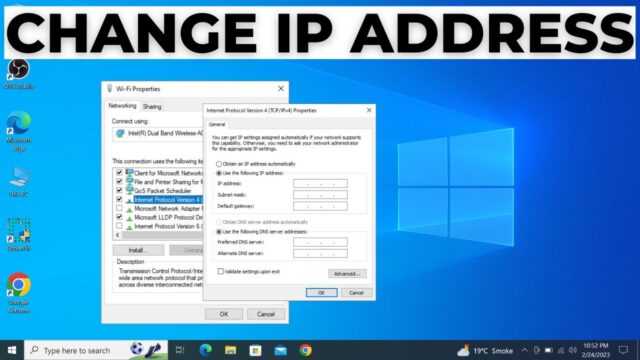
Changing your IP address in Windows can be useful for various reasons, such as troubleshooting network issues, enhancing privacy, or bypassing regional restrictions. This guide provides clear, step-by-step instructions on how to change your IP address in Windows 10 and 11, covering both local and public IP addresses.
Understanding IP Addresses
Before diving into the methods, it’s essential to understand the two types of IP addresses:
- Local IP Address: Assigned to your device within your local network (e.g., 192.168.1.2). Changing this can help resolve network conflicts or issues with specific devices.
- Public IP Address: Assigned to your router by your Internet Service Provider (ISP). Changing this can help with privacy or access to region-restricted content.
Method 1: Change Local IP Address via Settings (Windows 10 and 11)
- Open Settings:
- Press Windows + I to open the Settings menu.
- Navigate to Network Settings:
- Go to Network & Internet.
- Select Ethernet or Wi-Fi, depending on your connection.
- Access Adapter Properties:
- Click on Properties under your active network.
- Edit IP Settings:
- Scroll down to IP settings.
- Click on Edit under IP assignment.
- Configure Static IP:
- Choose Manual.
- Toggle IPv4 to On.
- Enter your desired IP address (e.g., 192.168.1.100), Subnet prefix length (usually 24), and Gateway (typically 192.168.1.1).
- Click Save.
Note: Ensure the IP address you choose is within your local network’s range and not already in use by another device.
Method 2: Change Local IP Address via Command Prompt
- Open Command Prompt as Administrator:
- Press Windows + X and select Command Prompt (Admin).
- Release Current IP Address:
- Type ipconfig /release and press Enter.
- Renew IP Address:
- Type ipconfig /renew and press Enter.
- Verify New IP Address:
- Type ipconfig to see your new IP address.
This method is useful for obtaining a new IP address from your router’s DHCP server.
Method 3: Change Public IP Address by Restarting Your Router
- Unplug Your Router:
- Disconnect the power cable from your router.
- Wait for 5-10 Minutes:
- This allows your ISP to assign a new public IP address.
- Reconnect the Router:
- Plug the router back in and power it on.
- Check New IP Address:
- Visit a website like WhatIsMyIP.com to see your new public IP address.
Note: This method works if your ISP assigns dynamic IP addresses. If you have a static IP, this won’t change your public IP address.
Method 4: Use a VPN to Change Your Public IP Address
A Virtual Private Network (VPN) routes your internet traffic through a server in a different location, effectively changing your public IP address.
- Choose a VPN Provider:
- Select a reputable VPN service (e.g., NordVPN, ExpressVPN).
- Install and Launch the VPN:
- Download and install the VPN application.
- Open the application and log in.
- Connect to a Server:
- Choose a server in the desired location and connect.
- Verify New IP Address:
- Visit WhatIsMyIP.com to confirm your new public IP address.
Note: A VPN also encrypts your internet traffic, enhancing privacy and security.
Method 5: Change Public IP Address via Router Settings
- Access Router Settings:
- Open a web browser and enter your router’s IP address (commonly 192.168.1.1 or 192.168.0.1).
- Log in with your router’s admin credentials.
- Navigate to WAN/Internet Settings:
- Look for sections labeled WAN, Internet, or Network settings.
- Change Connection Type:
- If possible, change the connection type from DHCP to Static IP and save the settings.
- Reboot the Router:
- After making changes, reboot your router to apply the new settings.
- Check New IP Address:
- Visit WhatIsMyIP.com to see your new public IP address.
Note: Not all routers allow changing the public IP address through settings. If this method doesn’t work, consider using a VPN or contacting your ISP.
Method 6: Use a Proxy Server to Change Your Public IP Address
A proxy server acts as an intermediary between your device and the internet, masking your real IP address.
- Choose a Proxy Service:
- Select a reputable proxy service provider.
- Configure Proxy Settings:
- Go to Settings > Network & Internet > Proxy.
- Enter the proxy server’s address and port number provided by your service.
- Save Settings:
- Click Save to apply the new proxy settings.
- Verify New IP Address:
- Visit WhatIsMyIP.com to confirm your new public IP address.
Note: Using a proxy can provide anonymity but may not encrypt your internet traffic like a VPN.
Method 7: Contact Your ISP to Request a New IP Address
If other methods don’t work, you can contact your Internet Service Provider (ISP) and request a new public IP address.
- Find Your ISP’s Contact Information:
- Locate the customer support number or email address for your ISP.
- Request a New IP Address:
- Call or email your ISP and request a new public IP address.
- Follow ISP’s Instructions:
- Your ISP may require you to perform specific steps or may change your IP address remotely.
Note: Some ISPs may charge a fee for this service or may not offer it at all.
Conclusion
Changing your IP address in Windows can be accomplished through various methods, depending on whether you’re aiming to change your local or public IP address. Always ensure that any changes you make are within your network’s configuration and that you have the necessary permissions to modify network settings.
If you need further assistance or have questions about changing your IP address, feel free to ask.


